Installing the Server/Client/FEP using Custom Mode
Scenario: You have acquired the software distribution for Desigo CC containing all the required folders including
- Brand,
- EM folder with the required extensions along with their EULA and other required files/folders, for example, PostInstallation folder containing post-installation steps
- GMS folder containing Languages and Prerequisites folders along with other required files
- (Optional) Languages folders for additional language packs
- Gms.InstallerSetup.exe.
On a fresh computer, where no prerequisites are installed, you want to install the Setup type – Server/Client/FEP using the custom installation mode.
The post-installation steps for License Activation, Project Setup, when enabled, are also executed as part of the installation process.
Furthermore, the post-installation step for extensions selected for installation (such as additional software installation, template synchronization, web app creation), if configured, are also executed as a part of the installation process.
Reference: For background information, see the reference section.
Workflow diagram:
Prerequisites:
- As specified in the installation roadmap, you have referred to the planning checklist.
- Obtained and verified the software distribution setup.
- For setting up the Setup type – Server/Client/FEP with local web server (IIS), you have installed and configured IIS on the Server/Client/FEP computer,
- Completed the Installation Planning Requirements including installing .Net 4.7.2,
- Enabled the required post-installation steps,
- Acquired the administrative rights on the system where you are performing the custom installation.
Steps:
- Insert the product DVD into the DVD-ROM drive.
- The Welcome to the Desigo CC Install Wizard dialog box displays: If this dialog box does not display, select the Gms.InstallerSetup.exe file located in the InstallFiles folder of the InstallerDVD directory and double-click to run.
- A User Account Control message may display, if your UAC settings are set to Default or Always Notify, asking you if you want to allow this installation program to make changes to the computer. Click Yes (see Changing User Account Control Settings).
- A confirmation message may display if the installation, uninstallation, or repair of another program is in progress. To continue with Desigo CC installation, click Yes. Otherwise, wait for the program to complete its installation, uninstallation, or repair by clicking No and rerun the Gms.InstallerSetup.exe file.
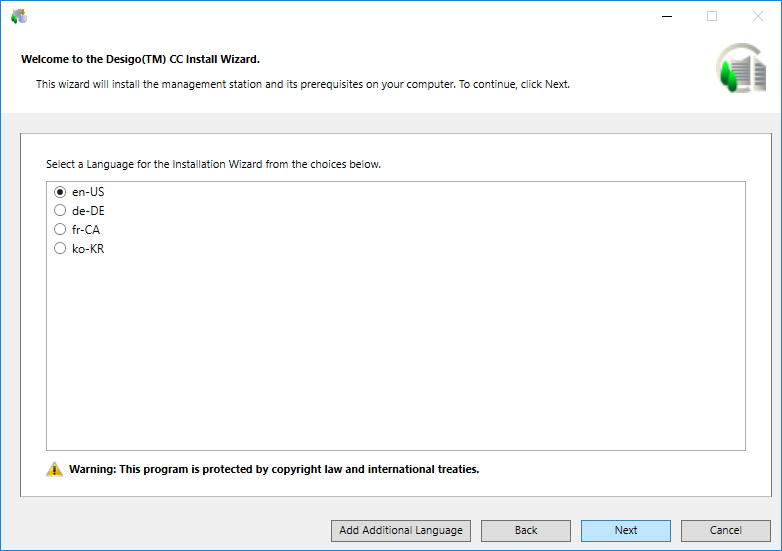
- The Welcome to the Desigo CC Install Wizard dialog box displays.
- In the Welcome to the Desigo CC Install Wizard dialog box, do one of the following to determine which language displays on your Installer Wizard:
- Accept the default language selection. The installation language of the OS is the default language if the language pack is available; otherwise, en-US is used. The Welcome to the Desigo CC Install Wizard dialog box and all related messages on this dialog box, however, always display in en-US.
- Change the default language by clicking Add Additional Language, navigating to the directory containing your supported language file, selecting Gms.InstallerSetup.resources.dll, and then clicking Open. You can select a language from the list of languages available in the Languages folder on the Installer DVD.
NOTE: If you encounter errors during a consistency check, for example, regarding extensions or post-installation steps, see Consistency Check Scenarios.
- Click Next.
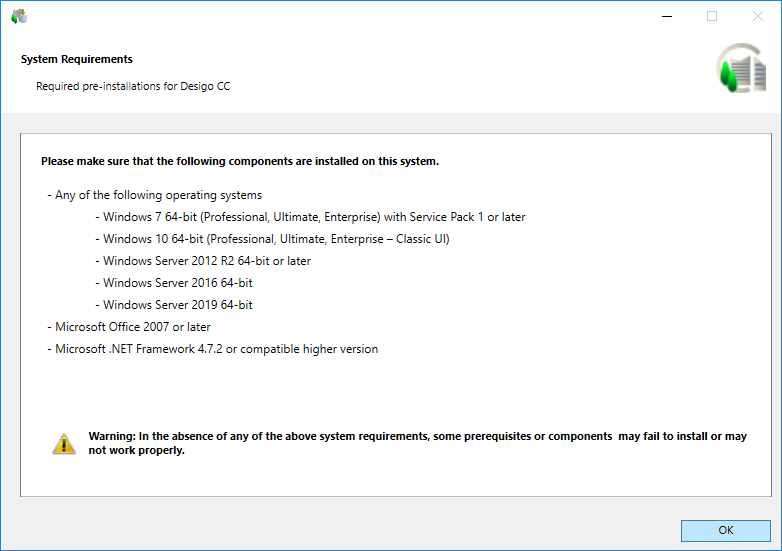
- Next to System Requirements, click View.
- Verify that the computer has all listed software in the System Requirements dialog box.
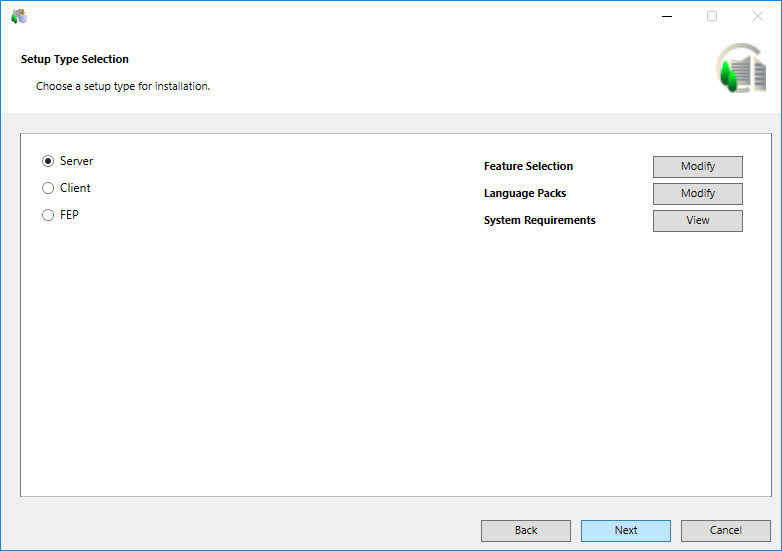
- In the Setup Type Selection dialog box click Next to proceed with the default feature selection and the default language pack selection for the default Setup type - Server.
- Change the default Setup type to select Client/FEP.
NOTE 1: Changing the Setup type provides you with set of extensions and prerequisites applicable for the selected Setup type.
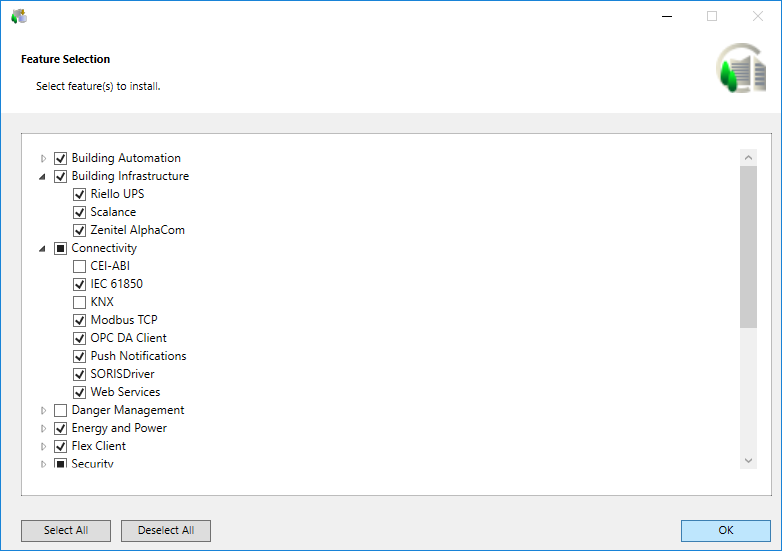
- Next to Feature Selection click Modify.
- A list of all extension suites along with the extensions that can be installed on the server displays.
- Deselect LL extension suites/modules that you do not want to install. Selecting or deselecting an extension automatically deselects all the dependent extensions.
- Click OK to return to the Setup Type Selection dialog box.
- Next to Language Packs, click Modify adjacent to Language Packs.
- All the language packs available in the Languages folder located at the path …\InstallFiles on the Installer DVD are listed.
- Select the language packs that you want to install.
NOTE 1: To select more language packs for installation from another location or media, click Add Language Pack. (See Verify the Languages Folder in the current version of Desigo CC )
NOTE 2: All required language packs must be installed before a customer project is created. Once the customer project is created, you can install additional language packs. However, you cannot add them to the available project languages. For add a newly added language pack, you need to create another project.
- Click OK.

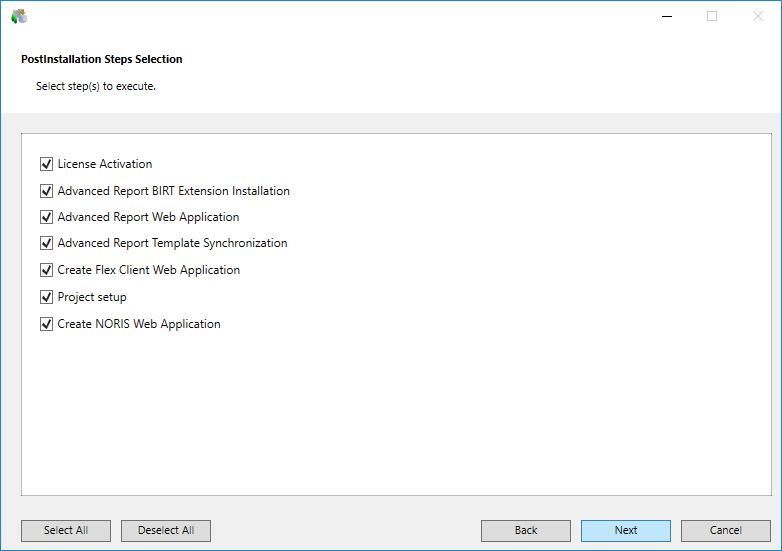
- The Post-Installation Steps Selection dialog box displays listing the post-installation steps for the SetupType = Server for the
- LicenseActivation, if available at the path ..\InstallerDVD\InstallFiles\GMS\PostInstallation
- Project setup for the mandatory extension SMC as well as for the selected extensions at the path ..\InstallerDVD\InstallFiles\EM\[EMName]\PostInstallation.
NOTE: Only those post-installation steps, for which the tag is configured as Execute = AskUser in the [GMS/EMName]PostInstallationConfig.txt file, are displayed in the PostInstallation Steps Selection dialog box.
- Deselect the post-installation step that you do not want to execute.
NOTE: For a post-installation step, ifExecute = Alwaysis configured in the [GMS/EM Name]PostInstallationConfig.txt file, then that post-installation step is not listed in the PostInstallation Steps Selection dialog box. However, such steps are directly listed in pending list of the Ready to Install the Program dialog box.
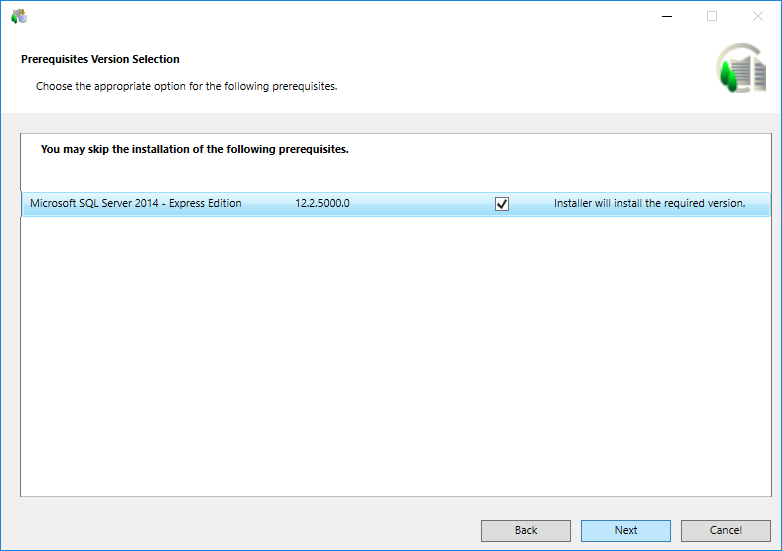
- The Prerequisites Version Selection dialog box displays listing the required versions of the installed prerequisites.
NOTE1 : For the Setup type - Client/FEP the Prerequisites Version Selection dialog box displays only when there is any conflict with the installed prerequisites in the system. It lists the required versions of the installed prerequisites and recommends you to install the required version, if the installed version is not compatible.
NOTE 2: When you install the Server on a fresh system, by default, the prerequisite Microsoft SQL Server 2014 - Express Edition is listed in the Prerequisites Version Selection dialog box.
By default, the Install check box is selected indicating that it is recommended to install the prerequisite Microsoft SQL Server 2014 - Express Edition. However, if you want to use another server, you can skip the SQL Express installation by clearing the Install check box. If you skip the Microsoft SQL Server installation, then the three prerequisites—Microsoft SQL Server 2012 - Native Client, Microsoft SQL Server 2014 - System CLR Types, and Microsoft SQL Server 2014 - Management Objects—are installed on the server in the specified order. Installing these prerequisites helps creating an HDB remote server using SMC, when there is no SQL on the server.
NOTE 3: If the compatible higher version of SQL is already installed on your computer, by default, the Installer skips the installation of the lower version of SQL (the Install check box is deselected).
- Click Next.
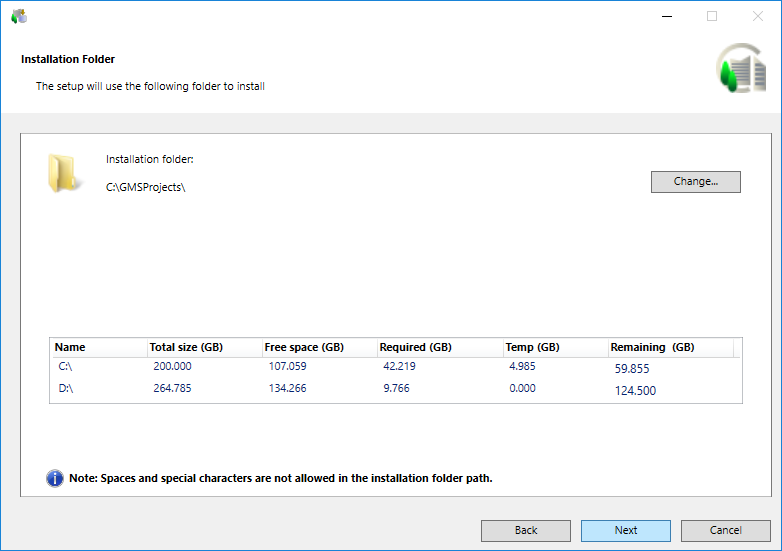
- In the Installation Folder dialog box, accept the default installation directory location C:\GMSProjects for the installation or choose a new location by clicking Change.
The Installer acalculates and displays the disk space required for the selected setup type installation on the selected drive and the temporary disk space required only for the time of installation (always calculated only for the system drive). Click Next.
NOTE 1: No illegal characters or sequences are permitted in the directory path.
NOTE 2: If a negative number in red displays in the Remaining Space field, you must re-run the setup after freeing the required disk space. (See Tips to Free Up Disk Space)
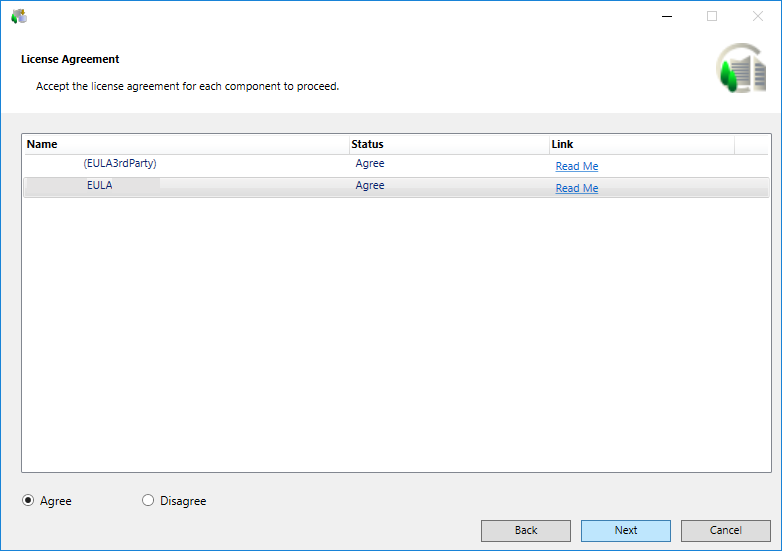
- In the License Agreement dialog box, accept the terms of the license agreement by selecting Agree for each license that you want to install and then click Next.
NOTE: You cannot proceed without accepting the license agreement.
- Click Next to display the Ready to Install the Program dialog box listing the status of the prerequisites, Desigo CC installation, extension modules installation, help merging status, and the status of the post-installation steps that you selected for execution and status for those which are executed mandatorily.
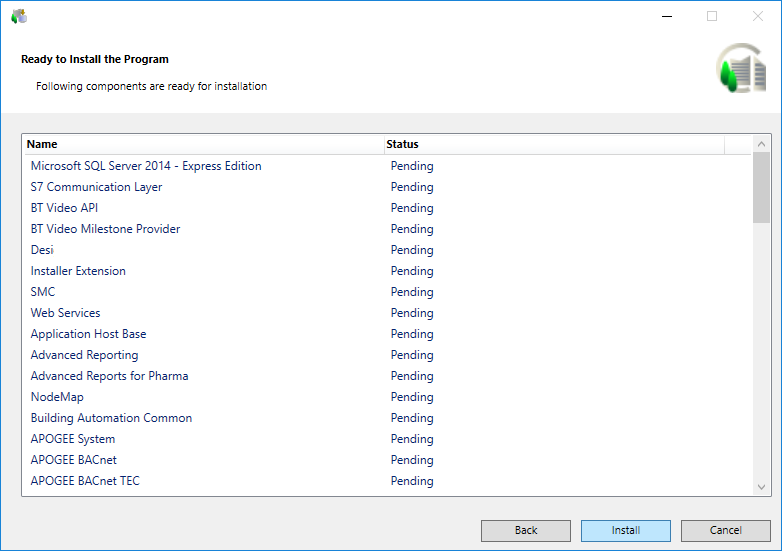
- Click Install. The Installer installs the listed prerequisites and any EMs.
- If a mandatory prerequisite fails to install, a message displays and the Desigo CC Installer aborts the installation process. However, if a non-mandatory prerequisite fails to install, the installation process continues and notifies you about the failure at the end of the installation process.
- A message box may display asking you to restart the computer. Select Yes to restart the computer and continue the installation. After restarting, depending on the Windows UAC settings, if the Installer Wizard does not start automatically displaying the Ready to Install the Program dialog box, then you must restart it manually by double-clicking Gms.InstallerSetup.exe, or get approval from IT to change the UAC settings accordingly. (See Changing User Account Control Settings)
- A message may display if installation, uninstallation, or repair of another program is in progress notifying you that you must complete the ongoing installation, uninstallation, or repair prior to installing Desigo CC.
- You can cancel the installation using Cancel. On confirmation, the cancellation process starts after maintaining a consistent state for the Installer. However, it does not rollback and informs you that the installation was interrupted and is incomplete.
- When the installation program is complete, the Installation Complete dialog box displays. Click Close to complete the installation.
- In case of any installation errors, click the View Log button to open the log file and view the details of the errors. (See Description of Installer Error Codes).
- If the installation of an extension containing the post-installation steps fails, the execution of the corresponding post-installation steps is also skipped and an error message is logged. (See Consistency Check Scenarios.)
- The selected Setup type (Server/Client/FEP) with web server (IIS) installation is successful. The post-installation steps, if applicable and enabled, for the selected setup type are also executed.
- (Optional and applicable only for post-installation step – License Activation) The licenses are activated based on the license files (.lic) available and/or Activation/Entitlement IDs specified. You can verify license activation of these files in LMU.
For already active licenses, expired licenses, invalid file format or missing files, and so on a message displays:Installation Successful but with some errorsin the Installation Complete dialog box. In this case click the View Log button that displays in the Installation Complete dialog box to open the Installer ELog file.
- (Optional and applicable only for post-installation step – Project Setup) A project template or a project backup from the specified backup path is restored. It also creates an empty History Database with or without Long Term Storage and links the HDB to the restored project, upgrades the project, if required, activates and starts the project, and then finally displays the logon dialog box for specifying the credentials.
A password prompt is displayed during the project restore when Pmon user is domain/local user and is a specific account.
- In addition, a website and a web application is created. If you have configured an existing Windows domain user, you must provide the password in the command prompt window that displays during website creation. It is added as a member of the IIS_IUSRS group. Otherwise, a new web application user is created and added as a member of the IIS_IUSRS group.
- Internally, this user is assigned access rights on virtual directories (graphics, libraries, documents, shared, and devices folders) inside the Server project folder. Also, a default self-signed certificate used for securing communication between the Web/Windows App client and the web server (IIS) is created.
- The web application is linked to the project and the website and web application https URLs are provided in the installation log file.
For any invalid website/Web application configuration, missing IIS configuration, invalid domain user and so on, a message displays:Installation Successful but with some errorsin the Installation Complete dialog box. For more information, refer to the SMC log.
- (Optional and applicable only for post-installation steps of other extensions) The post-installations steps of other extensions, when correctly configured, enabled (modified the .txt file to .xml) are executed as well successfully.