Overview of Address Book
The Desigo CC address book stores a list of contacts (called recipients) which the system can use for sending out remote notifications or for emailing reports.
The contacts you add to the address book do not have to be Desigo CC users. This is an entirely separate list.
You can view and edit the address book in both Operating and Engineering mode. For instructions, see the step-by-step section.
Address Book Workspace
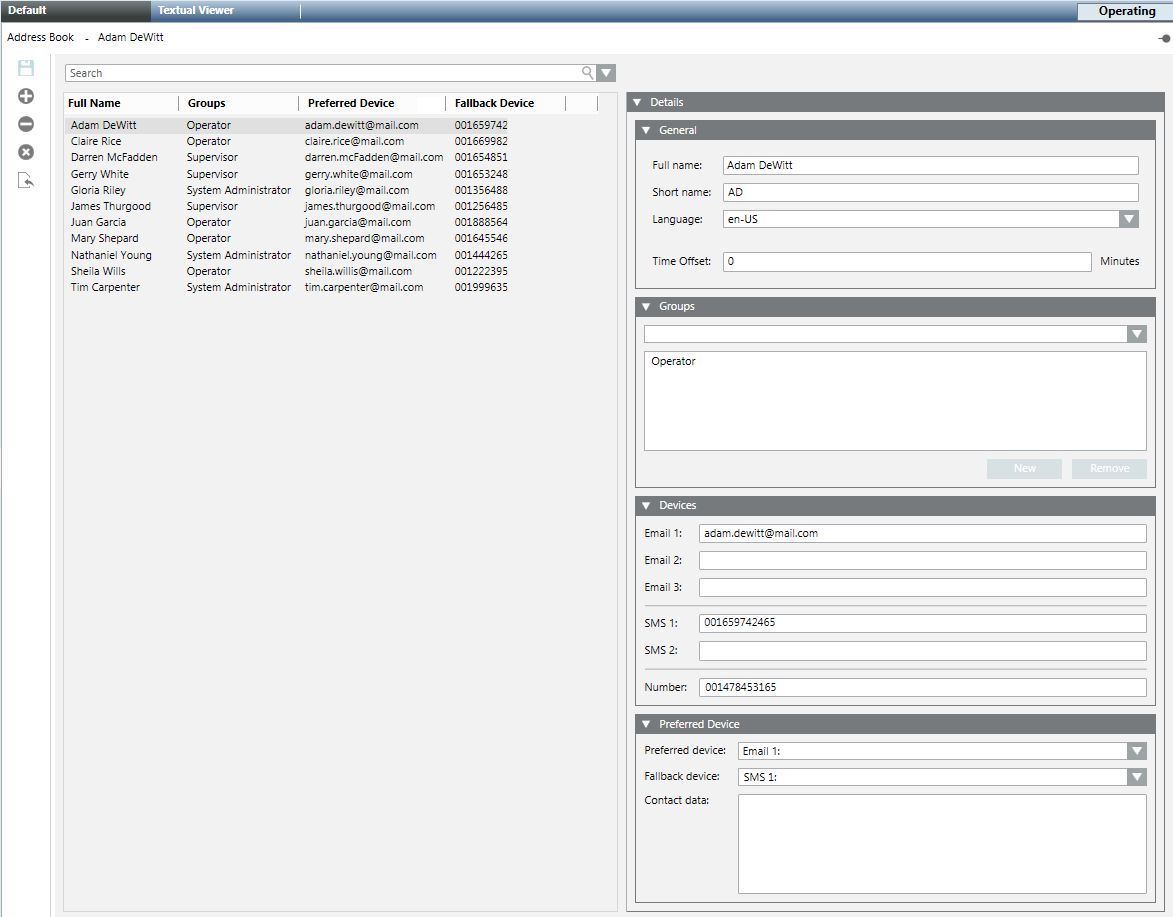
The address book is accessed in the Application View of System Browser, at the path Applications > Address Book.
The left panel shows the list of contacts already configured in the address book. The Details expanders on the right displays the details of the currently selected contact. for more information about these fields, see Details of an Address Book Contact, below.
Address Book Toolbar Controls
| Name | Description |
| Save Recipient | Save any changes made to the details of the currently selected contact. |
| Add Recipient | Add a new contact to the address book. |
| Remove Recipient | Delete the currently selected contact. |
| Remove All Recipients | Clear the entire address book. |
| Import Address Book | Import a CSV contacts file exported from Microsoft Outlook. |
| Search in the address book | To search for contacts in the address book, type some characters in the search field For more details, see Address Book Search Field. |


NOTE:
If you accidentally delete a contact or clear the address book, you can recover by exiting the Address Book workspace without saving the changes made. To do this, select a different node in System Browser, and when prompted Unsaved data. Do you want to save the data before leaving this page? Click No.
Address Book Search Field
When the address book contains many entries, you can use the search feature to help you find a specific contact.
- To run a new search, in the Search
 field at the top, start typing in some letters/characters contained in the following fields: contact’s Full Name, Groups, or Preferred/Fallback Device.
 - As you type, the contact list is filtered to show only the contacts that match the entered characters.
- To repeat a recent search, or to quickly filter by groups, click the Search-field drop-down list to display a list of your Recent Searches, along with a list of the configured Groups (under Saved Searches).
- Click a search in the list to repeat it.
- Click x alongside a search to remove it from the list.
- To clear a search, click
 alongside the search field to remove the filter and display the full contact list again.
Details of an Address Book Contact
When you select a contact in the Address Book, the Details expanders displays all the information about that individual.
General Expander
- Full Name: For example, John Doe. This value must be unique.
- Short Name: Optional nickname or initials for the contact.
- Language: Default is English (U.S.).
- Time Offset: User’s time offset with respect to Desigo CC server time. Default is 0 (no time offset). This setting will also be reflected in the remote notification message tailoring time tag values.
Groups Expander
Here you can optionally assign a contact to one or more Groups (for example, Operator, Administrator, and so on).
NOTE: Groups are required for remote notifications, which are addressed to recipient groups, not to individuals. You do not need groups for reports, which can instead be emailed to individual contacts.
The Groups expander shows any groups to which the selected contact is already assigned.
- To assign a contact to an existing group, you must select the group name from the drop-down list and click Add. (The drop-down list shows only the groups to which the contact does not already belong.)
- To remove a contact from a group, you must select the group name in the field and click Remove. If all contacts are removed from a group (the group becomes empty) the group itself is eliminated, and no longer displays in the drop-down list.
- To create a new group and assign it to the contact, you must type a new group name directly into the empty drop-down list field, click Add, and click Save
 . This group will then become available in the drop-down list for other contacts as well.
 - To rename a group, select the group from the Groups expander, you must type its name in the drop-down list field, click Update, and click Save . The group will be renamed for all the contacts that use it.
Devices Expander
Here you can specify one or more devices, that is, methods which can be used for contacting that person, such as email addresses, mobile phone numbers for SMS messages, and/or a pager number:
- Email: you can specify up to three email addresses.
- SMS: you can specify up to two mobile phone numbers for SMS messages.
- Number/Provider: Depending on the pager service configured, you must specify a pager number only or a pager number and provider.
NOTE:
Reports can be sent by email. Remote notifications can be sent by email, SMS, and/or pager. For each of these communication methods to work, the corresponding service (email, SMS or pager) needs to be configured on the Desigo CC server station.
Preferred Device Expander
- Preferred Device: This is the first method of contacting the person to be tried. By default, it is set to the first email address that you configured in the Devices expander. You can select a different preferred device from the drop-down list.
- Fallback Device: This is the method that will be used if sending a message to the preferred device fails. It has to use a different service from the preferred device. For example, if the preferred device is an email address, the fallback cannot be a different email address. It has to be an SMS number or a pager number.
NOTE:
The preferred and fallback device settings are used only by remote notifications. When you email a report you can choose from all the email addresses entered for each contact.
Outlook Import Rules for the Address Book
The Desigo CC address book can import CSV contacts files exported from Microsoft Outlook 2003 and 2007 but only in English language.
If a CSV file is not already available, you can export contacts from Microsoft Outlook into a CSV file as follows:
- If your language is not English, change this setting to English in Microsoft Outlook before proceeding to export the contacts. See also:
Microsoft Office 2007 and other versions: http://office.microsoft.com/en-us/support/change-the-default-language-for-office-programs-HA010356057.aspx - In Microsoft Outlook, select File > Import and Export > Export to a File > Comma-Separated Values and then choose a location on disk and a name for the file (for example, myContacts.csv).
- The CSV file is created in the specified location.
Once you have obtained an exported CSV file, you can check it by opening it in a text editor. You should see:
- A multi-line text file where each line contains values separated by commas.
- The first row contains the field headers, while the succeeding rows contain the data, one contact per row.
The fields in the Address Book workspace are populated with data from the CSV file as follows:
- Preferred Device. The contact’s first valid email address in the CSV file is set as the preferred device. If there is no valid email address, a mobile phone number or pager is taken as the preferred device. If there is no valid email, SMS number, or pager number, then the contact is skipped (not added to the address book).
- SMS. Phone numbers in the CSV file can contain the following special characters:
- A plus sign (+) as a prefix to the number; during import this character is replaced by two zeros (00).
- An empty space, a hyphen (-), or a comma (,) between digits; during import these characters are removed.
- Full Name. The contact’s first name, middle name and last name (with space as a separator) in the CSV file are used to populate the Full Name field in the address book. It is limited to 50 alphanumeric characters.
- Email. Email addresses are limited to 50 alphanumeric characters. If the email address in the CSV file exceeds this limit, the field in the address book is left empty.
The following rules apply when re-importing a CSV file (for example, an updated version of a previously-imported Outlook contacts file):
- Any duplicated contacts (for which all the fields are unchanged) are skipped.
- If the preferred device field is changed (for example, a different email address), a new entry for the same contact is created.
- If any other data is changed (for example, name or other phone number) the existing contact entry in the address book is updated.