Select Project > Management System > Servers > Main Server > Pager.
The RENO Configurator tab displays.
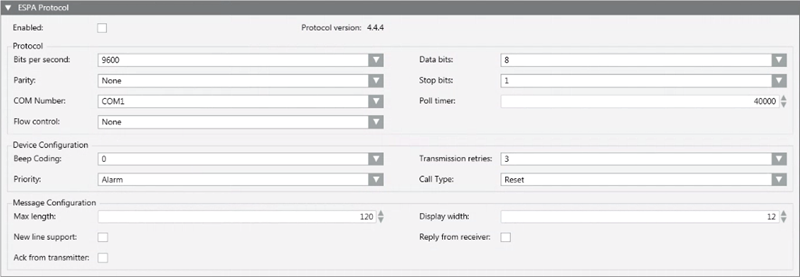
Open the ESPA Protocol expander.
Select the Enabled check box. NOTE: If this check box is unavailable (dimmed), open the TAP Protocol expander and disable the TAP protocol. (Only one paging protocol can be enabled at a time).
Refer to the paging equipment documentation to appropriately configure the following fields:
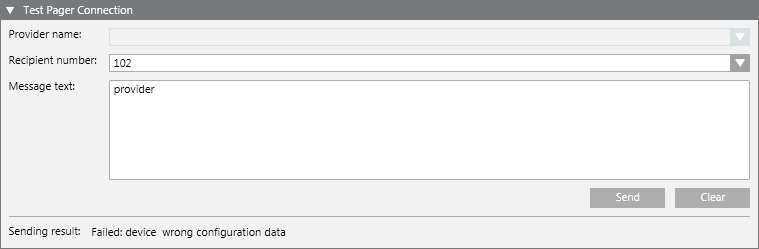
In the Recipientnumber field, select or enter a valid number.
In the Message field, enter the text of the message.
Click Send.
This will send the test pager message. The Sending result at the bottom of the expander shows the outcome and diagnostic information (for example, OK, Failed, and so on).
Check that the message is received on the recipient’s pager.
Information
NOTE: The Desigo CC’s diagnostics automatically detect if there is a problem with the pager protocol (such as, invalid configuration, paging equipment disconnected, and so on), and generate an event to notify you of the fact.
 .
.