Configuring the OPC UA Wrapper
Scenario: You want to configure the OPC UA wrapper to wrap the Desigo CC OPC server.
Reference: For background information, see OPC Server and Third-party OPC UA Client.
Workflow diagram:
Steps:
- Navigate to the setup directory, and extract the OPC UA server wrapper setup from the .zip archive TestPackage_OPC_UA_Wrapper.zip.
- Right-click the .exe file OPC UA Wrapper Setup.exe, and select Run as Administrator.
- Click Install.
- This installs the OPC Local Discovery Server.
- In the OPC UA Wrapper Tools window, click Next.
- Click Complete.
- Click Next.
- Click Install.
- Click Finish.
- Navigate to C:\Program Files (x86)\[company name]\OPCUAWrapper.
- Right-click the .exe file Opc.Ua.ConfigurationTool.exe, and select Run as Administrator.
- The UA Configuration Tool window displays.
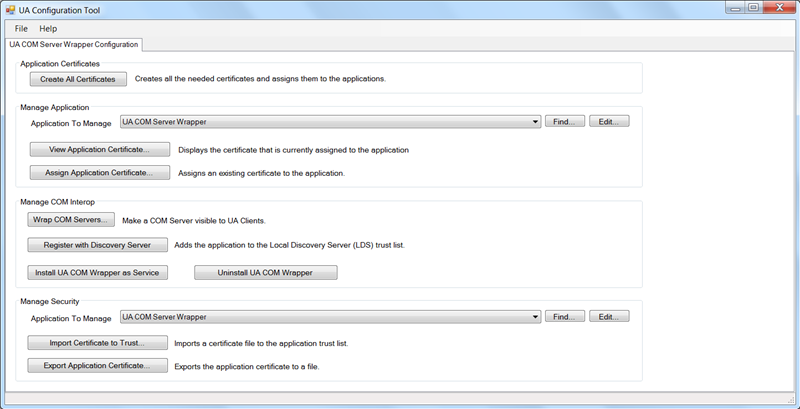
- In the Application Certificates section, click Create All Certificates.
- After a while, the Create Certificates dialog box displays.
- Click OK.
- The UA Configuration Tool window displays on the screen.
- If not already present, add the application Opc.Ua.DiscoveryServer (Local Discovery Server) as follows:
a. In the Manage Application section, next to the Application To Manage field, click Find.
b. Navigate to C:\Program Files (x86)\Common Files\OPC Foundation\UA\v1.0\Bin\.
c. Select the .exe file Opc.Ua.DiscoveryServer.exe, and click Open: The Opc.Ua.DiscoveryServer displays in the Executable File field in the Modify Application Information window.
d. Next to the Configuration File field, click Browse.
e. Navigate to C:\ProgramData\OPC Foundation\Config\.
f. Select the .xml file Opc.Ua.DiscoveryServer.Config.xml and click Open: The Opc.Ua.DiscoveryServer.Config.xml displays in the Configuration File field in the Modify Application Information window.
g. Click OK.
h. Click Yes: This closes the Modify Application Information window.
i. (Optional) To view the certificate currently assigned to the application, click View Application Certificate.
- Add the application UA COM Server Wrapper as follows:
a. In the Manage Application section, next to the Application To Manage field, click Find.
b. Navigate to C:\Program Files (x86)\Siemens\OPCUAWrapper.
c. Select the .exe file UA COM Server Wrapper.exe and click Open: The UA COM Server Wrapper displays in the Modify Application Information window.
d. Click OK: This closes the Modify Application Information window.
e. (Optional) To view the certificate currently assigned to the application, click View Application Certificate.
- The UA Configuration Tool window displays on the screen.
- To wrap new COM servers, in the Manage COM Interop section, click Wrap COM Servers.
- The Managed Wrapped COM Servers window displays.
- If not already present, add the UA COM Server Wrapper, as follows:
a. Next to the Wrapper to Manage field, click New.
b. Navigate to C:\Program Files (x86)\[company name]\OPCUAWrapper\.
c. Select the .exe file UA COM Server Wrapper.exe.
d. Click Open.
- In the Managed Wrapped COM Servers window, click Add.
- In the Select a COM Server to Expose via UA window, select [company name].OPC.Server.DA (that is, Desigo CC OPC server) to wrap it.

- Click OK.

- (Optional) To improve the algorithm that specifies how the hierarchical branches are separated, do the following:
a. In the Managed Wrapped COM Servers window, select [company name].OPC.Server.DA.
b. Click Edit.
c. In the Separator Chars field, enter a period (.).
d. Click OK.
- Click Close.
- A reminder message informs you to restart the UA Wrapper service to apply the configuration changes. You can ignore this message if this is the first time you configure the UA wrapper as this service is not yet installed.
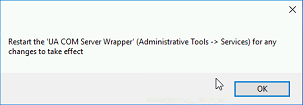
- Click OK.
- In the UA Configuration Tool window, click Register with Discovery Server.
- Click OK.
- Click Install UA COM Wrapper as Service.
- Click OK.
These are recommendations on the actions required to support the Mutual Authorization tier.
OPC UA security requires that all the endpoints participating in the UA communication accomplish this task using a secure connection.
To comply with the security requirements, each UA server instance and UA client instance must provide a trusted certificate to identify itself. These certificates may be self-signed. Therefore, a user with administrator rights must add them to a local trusted certificate store on both the server and client nodes before attempting any secure UA client/server connection.
The following diagram illustrates the manual certificate handling process described in the following procedure.

Exchanging Certificates Between UA Clients and UA Server Wrapper
The following example shows how to manually exchange certificates between the UA server running on one computer (Computer1) and the UA client running on a second computer (Computer2). This example assumes that the users have administrator rights on both.
Generate the Server Certificate on Computer1
- Navigate to C:\Program Files (x86)\[company name]\OPCUAWrapper.
- Right-click the .exe file Opc.Ua.ConfigurationTool.exe, and select Run as Administrator. This displays the UA Configuration Tool window.
- If not already present, add the executable UA COM Server Wrapper as follows:
a. In the Manage Security section, next to the Application To Manage field, click Find.
b. Navigate to C:\Program Files (x86)\[company name]\OPCUAWrapper.
c. Select the .exe file UA COM Server Wrapper.exe and click Open.
d. Click OK.
- The UA COM Server Wrapper displays in the Application to Manage field in the Managed Security section.
- To generate a file that contains the server certificate, click Export Application Certificate.
This file can be used to import the certificate into another machine. The resulting DER file does not contain the Private Key information. The server certificate can be copied to any destination, including flash drives or network share locations.
- In the Save Certificate File window, select the destination where you want to save the server certificate and click Save.
Exchange the Certificates Between Computer1 and Computer2
- Move the exported server certificate from Computer1 to Computer2 and import it.
NOTE: To import the certificate use the method provided by the third-party OPC UA client in use.
- On Computer2, export the UA client certificate.
NOTE: To export the certificate use the method provided by the third-party OPC UA client in use.
- Move the exported client certificate from Computer2 to Computer1 and import it, s follows:
a. In the Manage Security section, check that the Application to Manage field displays UA COM Server Wrapper.
b. Click Import Certificate to Trust.
c. In the Import Certificate dialog box, select the DER file to import and click Open.
d. Click Yes.
When the certificates exchange is completed, restart the UA COM Server Wrapper service.