Restoring a Project or Creating a Project from a Template
Scenario: On Desigo CC Server you want to restore a project backup or you want to create a project from a project template using SMC as a very first project.
Your project restore/creation from template sequence may differ if a project already exists in SMC. This is indicated in the procedures, whereever applicable.
Use the same steps to setup the Stand-alone Server, where you work with the project by launching the Desigo CC Client application on the Stand-alone Server.
For working with the Stand-alone Server, you can leave the Server Communication as Stand-alone and the Web Server Communication as Disabled.
Reference: For background information, see the reference section.
Workflow diagram:
Prerequisites:
- For working with the SMC, the logged in user on the Server computer has Administrative rights.
- The Windows (local/domain) user, set as the System account user (project’s Pmon user), has the Log on as Service Right set. In addition, it may have Administrative rights.
For this, you must add a user account to the Administrators group.
(see https://technet.microsoft.com/en-us/library/cc772524(v=ws.11).aspx ). - The Setup type – Server is installed along with all the required extensions.
- You have launched SMC.
- You have acquired the password of the restored project/template project, required when logging on to the Desigo CC Client application.
- There is enough free disk space available (at least double the size of the project to be upgraded) on the selected drive of the Server computer for the project that you are about to create or restore from template.
For example, if a project requires 2 GB disk space, there should be a minimum 4 GB space available on the same drive. This is needed because, when you restore and upgrade a project, a temporary copy of the project is created on the same drive. If there is not enough free space, the restore/upgrade process fails and logs several error messages in the SMC.log file available at [installation drive:]\[installation folder]\GMSMainProject\log. - Ensure the project backup is
- a valid backup, a project backup with config and db (database) folders.
- unzipped and the backup directory path is known and accessible.
- The Server project you are about to restore using Version 4.0 has the Data version greater than or equal to Version 2.1.
- For linking an History database to the project, an HDB is created and started in SMC.
Steps:
Using SMC, you can restore a project/project template only on a Server. During restore process, the SMC internally checks if the backup selected for restore is compatible with the current Data version or if it needs an upgrade.
- In the SMC tree, select Projects.
- Do one of the following:
- Click Restore Project
 to restore a project backup. In the Select project backup folder dialog box, locate and select the source directory (archive path) and click OK.
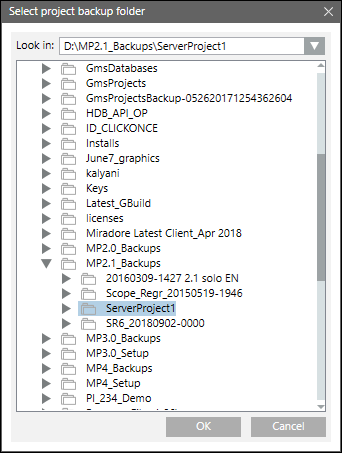
- Click Create a Project from Template
 to create a project from a project template. In the Select project template folder dialog box, select the desired project template from the ProjTemplates folder and click OK.
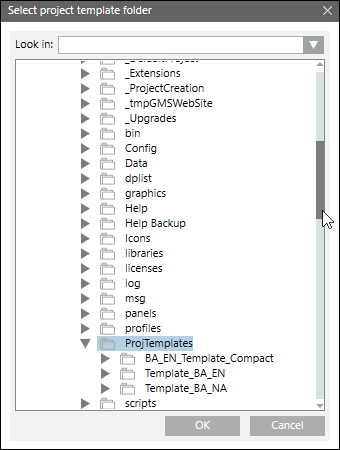
- The Server Project Information expander displays with the fields filled in (including the port numbers and the history database) according to the selected backup.
- (Optional) Edit the following fields as required:
- Project name: Provide a unique name for the project. No two projects with the same name can exist in the SMC. If there is already a project in SMC with the same name as the project you are about to restore, you must either rename the project you are about to restore to a different name or stop and then delete the existing project that has the same name, and then perform the restore.
- Project path: Click Browse to change the default project path
[installation drive:]\[installation folder].
- Port information: Displays the default port numbers for ports Pmon, Data, Event, HDB Reader and so on.
- Linked HDB: By default, the HDB specified in the project config file and if that HDB is found on the Server where you are about to restore the project is displayed. You should link an HDB which is not linked to another project. Otherwise, select a new database. However, you may also Link or Modify an HDB after Creating or Restoring a Project.
- Click Save Project
 .
.
- A message displays if the project you are about to upgrade is too old to upgrade. It is recommended not to restore such a project because even after a successful restore, you cannot upgrade it.
- A message displays if the selected HDB is already linked to another project.
- Click OK.
- A message displays with details of the selected backup folder, including the project name, project path, date/time when the backup was taken, the Desigo CC Data version which was used to run the given backup, restore path, and language(s) of the backed-up project.
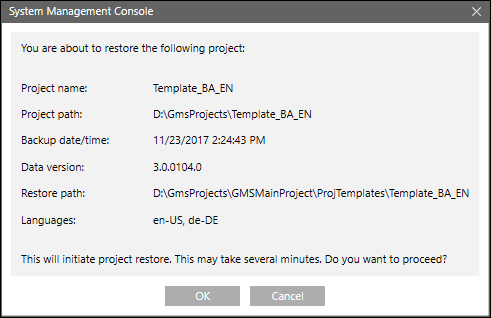
- Click OK to restore the selected project/project template.
- On confirmation, the project/project template is restored successfully, the project node displays under the SMC tree, the project folder is created at the specified project path, the Start, Stop, Activate, Edit, and Delete Project icons are available and the Upgrade icon is enabled only when the restored project version is older than the installed one.
Use this procedure to upgrade the restored project having a Data version less than the current setup Data version. For V4.0 the Minimum Upgradable Version is V2.1.
For upgrading the project backups having the Data version less than the V2.1, see Upgrade a Server Project having Version 1.0 or 1.1.
Not all outdated projects are upgradable.
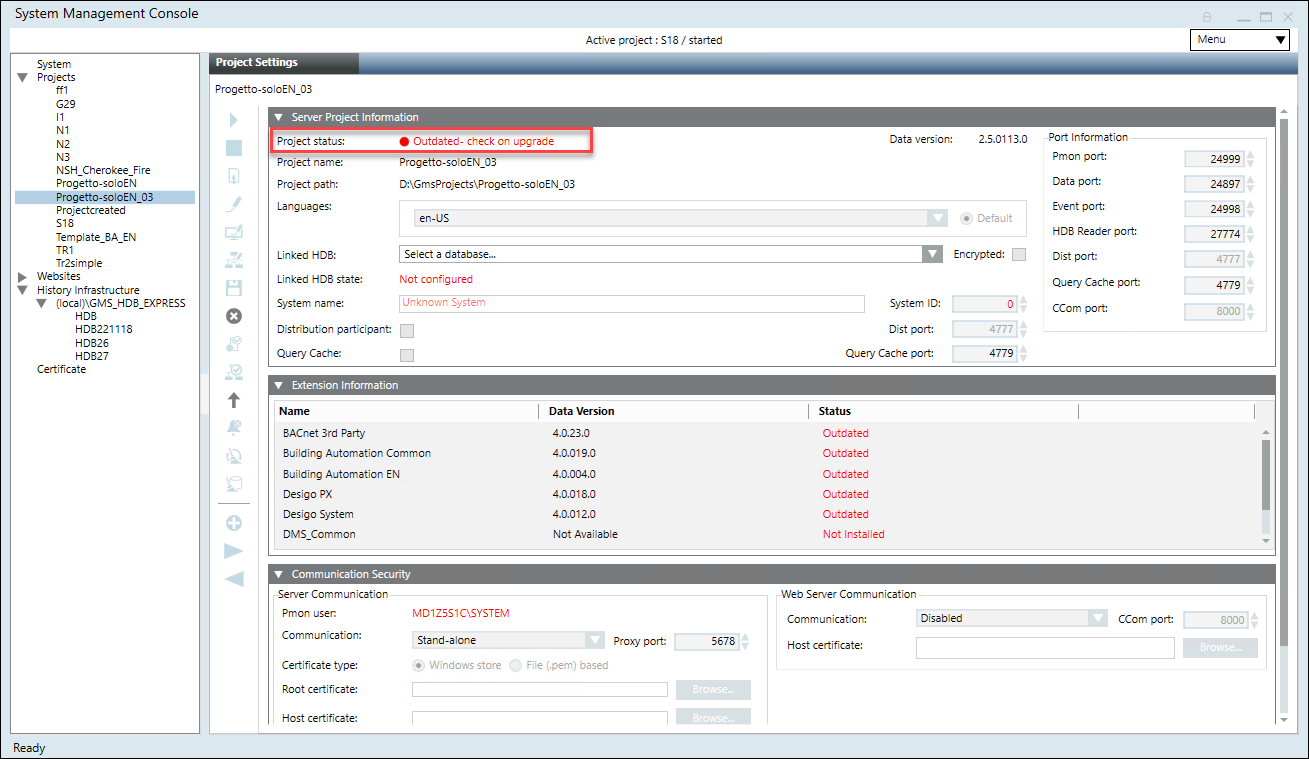
If the version of the project backup is too old to upgrade, the Project status after restore is Outdated - Too old to upgrade. When you upgrade such a project, a message informs you accordingly.
If the Project status is Outdated – check on upgrade – inconsistent progs file, see the section Troubleshooting projects.
- You have restored the project with a Data version earlier than the current Desigo CC setup Data version and in the Server Project Information expander of the Project Settings tab, the Project status is
Outdated(in red) oroutdated - check on upgrade(in red).
- In the Project Settings toolbar, click Upgrade
 .
.
- A confirmation message displays.
NOTE: If the Proxy port (default 5678), of the Server project that you are about to upgrade is already in use, a message displays.
- Click OK.
- A message displays if the port numbers of the project you are about to upgrade are in use.
- Click OK.
- Click Edit
 to enable the port fields.
- Edit the port numbers according to the given range, ensuring that they are not the same as those of another started project.
- Click Upgrade again.
- The project upgrade starts internally. On successful completion the selected project is upgraded to the current Data version, the status
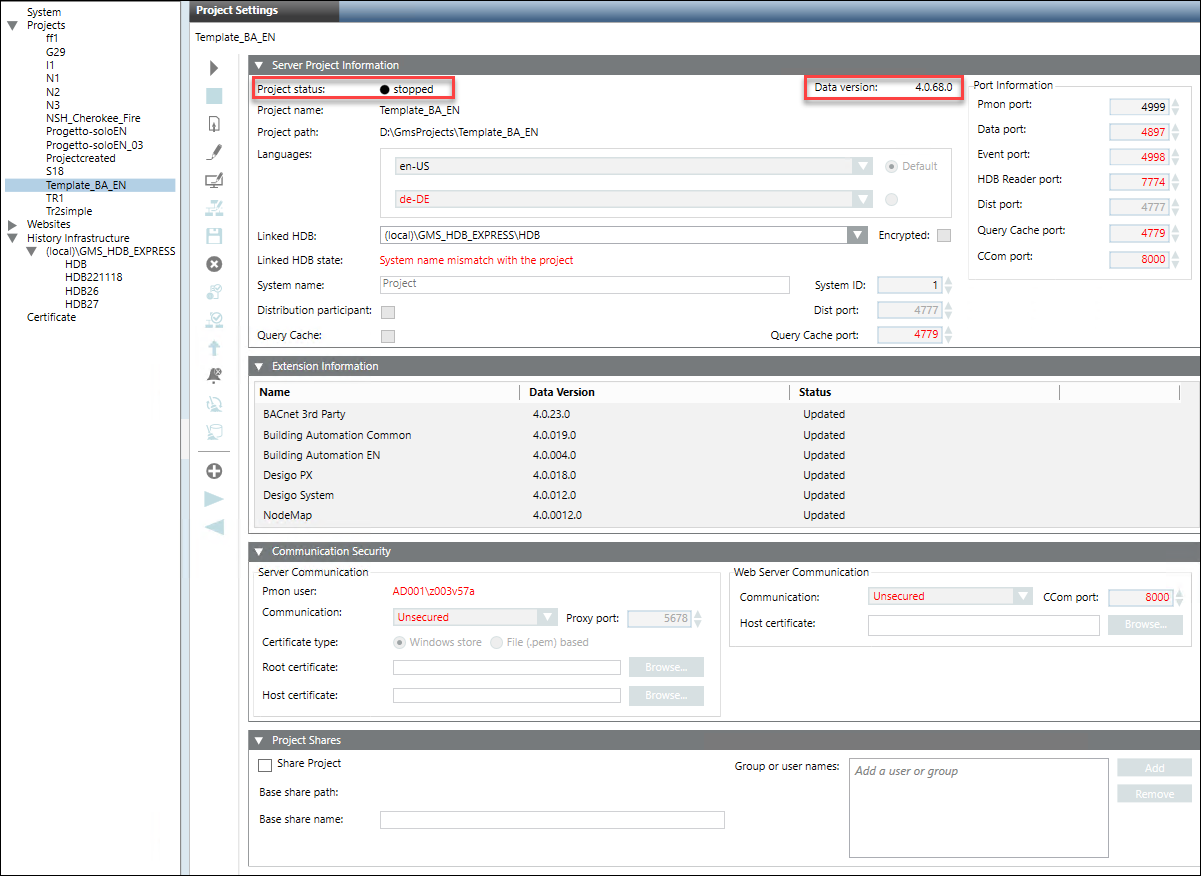
Stoppeddisplays in the Server Project Information expander of the Project Settings tab.
After the project is restored the events configured in the restored project are not deleted automatically. Do the following procedure to remove all the events of the restored project at one go.
- The upgraded project is stopped and selected in the SMC tree.
- Click Remove Events
 to delete all the events from the project.
- A confirmation message displays.
- Click OK.
- All the events of a project are deleted.
From the installed extensions on the Server, you can add extensions that are not yet added to the project. However, you must add only required extensions.
You can also remove the extensions that are no longer needed in the project.

NOTE:
It is recommended to backup a project before removing extensions from it.
- You have installed all extensions that you want to add to the project.
If the extension is installed after the project is created, you must restart SMC so that the newly installed extensions become available for selection in SMC.
- The upgraded project is stopped and selected in the SMC tree.
- You have successfully removed any customization done to the extension, for example, customization to the Client profiles or libraries or a web application of the extension and so on that you are about to remove from the project.
- You have taken a Manual Project Backup from the Management Platform before removing an extension from the project.
- In the Project Settings toolbar, proceed as follows:
- To add the extension to the project, click Add to project
 .
.
- To remove an extension from the project, click Remove from project
 .
.
NOTE: If you select a parent extension, its child also gets selected for removal. You must manually uncheck if you do not want to remove it.
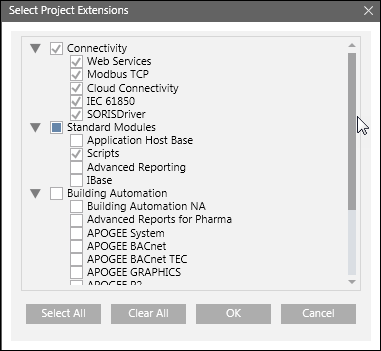
- In the Select Project Extensions Dialog Box dialog box that displays, expand the desired extension suite and select the extension that you want to add to/remove from the project.
- Click OK.
- Click Save .
- (Only when removing extension from a project) A confirmation message displays.
- Click OK.
NOTE: A message may display if an extension was unable to be removed from the project. You must remove any customization done to the extension’s client profiles or libraries in the Desigo CC Client before removing it from the project.
- On successful completion, the selected extension is added to/removed from the selected project.
Link an HDB to a project for storing project logs in HDB. One HDB should be linked to only one project. Linking an HDB to multiple projects is not recommended.
- The upgraded project is stopped and selected in the SMC tree.
- In the Server Project Information Expander, from the Linked HDB drop-down list, select a database that you want to link to the project.
- Click Save .
- A confirmation message displays if the HDB you are about to link to the project is already linked to another project.
- Click Yes.
- A message displays if the linked HDB’s System name does not match with the associated project’s System name. Click Yes to modify the linked history database’s System name.
If you click No, the Linked HDB State displays asSystem name mismatch with the project(in red). It is indicated in red because the linked HDB is already containing data of the previously connected project having different System name.
- The Linked HDB state is updated to
Connected, System name of the HDB is updated internally, and the selected HDB gets linked to the selected project.
Before activating a project, you can Modify the Server Project Parameters.
The very first project that you create, restore or create from template is activated automatically.
Use the following procedure to activate all the subsequent projects that you create/restore.
- Click Activate
 .
.
- A confirmation message displays.
- Click Yes.
- On successful completion, the selected project becomes active, the information of the active project displays in the Server Project Information expander of the Project Settings tab and the Information expander of the Management tab and the Desigo CC Installed Client runs with respect to the activated project.
For starting a project at least one active project must be available under Projects in the SMC tree.
- The project is stopped and has unique port numbers.
- Click Start
 .
.
- The project is started.
Next, for working with the project, you can launch an Installed Client on the Server.
For working with the project that you created from template, when you log into the Desigo CC Client application using the Default Administrator as Desigo CC user, you must assign a new password. However, if you have restored a project, you can login with the same old password.
In both the cases the old Root user password is invalidated once the project is started and you need to set a new password. In Additional User Administration Procedures, see Change a Password.
To log on to the Desigo CC Client application using the Windows user account, you do not need to change the old password.
For local Windows user, enter [Hostname]\[User name] and the password for the local windows account.
For domain Windows user, enter [Domain name]\[Domain user name] and the password for the domain Windows account.